Brake
Caliper Identification. [Query:] Does anyone know if there is
a way to tell which of the two caliper types (ATE or Girling) my 740 GLE
is using without removing the wheels?
[Response: Paul Grimshaw] Refer to the
product plate (located above passenger front headlight or in the trunk
or door jamb). Go to position "E" (end of the second line on the
right). The following codes apply:
2: Girling Front, ATE
Rear
3: DBA Front, ATE Rear
4: Girling Front and
rear
5: DBA Front, Girling
Rear
If I recall correctly, there's also a Bendix front caliper too, but Volvo does not list this as an item on the product plate. The best way is to look thru the wheel for a large iron bridge that reinforces the caliper body (with a slot on either side i.e. two slots).
[Another Query] I'm close to needing rear
brake pads on my wife's 90 740. Peeking through the rim, I see the capital
letter "A" in sort of an Italic script, followed by a couple more smaller
characters that I can't make out, cast onto the caliper. Can anyone tell
me what kind of brakes they are, given such weak info? Would it be
likely that the fronts are from the same manufacturer? Now the bonus
point question....what would the Volvo P/N's be for the pads? (Not that
I would necessarily use Volvo pads. [Response: Ted DOrazio] Your
rear calipers are ATE. The p/n for the rear pad set is 271824. In 1990
the calipers on the front can be either DBA (Bendix) or Girling. Both calipers
are dual piston but the pads are not interchangeable. The girling pad uses
a "W" shaped spring at the top held on by a rivet. To further complicate
things there are two different diameter brake rotors on the front as well:
10.5" or 11.25".
Brake
Pad Identification.
[Query:] When I went to get a set of front
disc brake pads for my 740t there were two types listed. Does anyone know
which type I would need or how to tell Bendix from Girling? [Response:
JohnB] The Bendix pads have two tabs on the outer edge of the backing plate,
some versions quite large, about 3/8 in by 3/16 in with a round cylinder
welded/brazed on each tab, others with two vestigial nubs....both types
come with slightly different anti-vibration springs so don't mix them.
The Girling pads have a single big tab with a post on it and the anti-vibration
spring wound around the post. Rotor size matters....the
11.25 in rotor works on Girling and Bendix brakes with separate rotor/hub.
Make sure you know what hub/rotor you have. Finally, your minimum
permissable pad thickness, when you are checking pads, is 3 millimeters
per Volvo specs for the front pads and 2 millimeters for the rear.
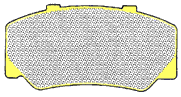
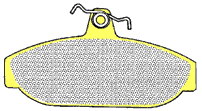
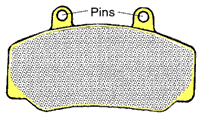
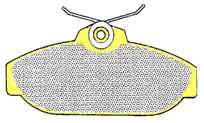
Here is a visual guide to brake pads used
in various caliper configurations in 700/900 cars, courtesy of RPR
where each pad set can be ordered on-line.
|
Front Pads:
|
||
|
REPCO 536
|
 |
700 w/ Bendix -87 original front. Volvo supercedes 83-87 Bendix pads to 88- Bendix pads. Order REPCO 1169 further down the page and update kit 3516813 |
|
REPCO 508
|
 |
700 w/ Girling
w/o ABS front
900 w/o ABS All front |
|
REPCO 1169
|
 |
700 w/ Bendix (update) -87 front 700 w/Bendix 88-on front |
|
REPCO 1198
|
 |
740 w/ Girling ABS 91-92 front 900 w/Girling ABS 91-on front |
| RearPads: | ||
|
REPCO 102
|
 |
700/900 w/ Ate rear |
|
REPCO 3067
|
 |
760 Girling
w/ IRS rear
900 Girling w/ IRS rear |
Brake
Rotor Identification.
[Editor's Notes:] Volvo 700/900 series
brakes came in a number of configurations: one-piece hub and rotor versus
separate rotor and hub; solid versus ventilated rotors; various calipers
for ABS and non-ABS; various rotor diameters and thicknesses. In
addition, early 700 series may have been converted to two-piece hub and
rotor configurations or to later "jumbo" rotors. Be very careful
when replacing the rotors. The only sure test is to measure the diameter
and thickness and order the corresponding replacement from a knowledgeable
parts department. The data in the two tables below are courtesy of
VolvoCars and RPR.
| Brake Rotor Types: | |||||
|
|
|
|
Diameter in | Thickness |
|
| Version 1 | Solid |
|
|
|
2-piston |
| Version 2 | Ventilated |
|
|
|
2-piston |
| Version 3 | Ventilated |
|
|
|
2-piston |
| Version 4 | Ventilated |
|
|
|
1-piston |
In the following chart, the "Absolute Minimum"
thickness is the thickness at which replacement is mandatory. The
"Minimum" thickness is used when you replace pads: if the measured
rotor thickness at the points of pad contact is less than this number,
replace the rotor. Conversion: 262.4mm= 10.5 inches; 280mm=
11 inches; 287mm= 11.25 inches. One inch =25.4mm.
| Brake Rotor Identification Chart: |
|
Rotor Thickness | |||||
| Car Model |
|
|
|
|
|
|
|
| Front Rotors: | |||||||
|
|
|
Bendix | Single rotor and hub |
287.0
|
22
|
20.8
|
20.0
|
|
262.4
|
22
|
20.8
|
20.0
|
||||
|
|
|
Bendix | Separate rotor/hub |
262.4
|
22
|
20.8
|
20.0
|
|
262.4
|
22
|
20.8
|
20.0
|
||||
|
|
|
Girling | Single rotor and hub |
280.0
|
14
|
12.3
|
11.5
|
|
262.4
|
22
|
20.8
|
20.0
|
||||
|
|
|
Girling | Separate rotor/hub |
262.4
|
22
|
20.8
|
20.0
|
|
|
|
ABS Bendix | Single |
287.0
|
22
|
20.8
|
20.0
|
| Separate |
287.0
|
22
|
20.8
|
20.0
|
|||
|
|
|
Bendix w/o ABS | Single |
262.4
|
22
|
20.8
|
20.0
|
| Separate |
262.4
|
22
|
20.8
|
20.0
|
|||
|
|
|
Girling w/o ABS | Single |
262.4
|
22
|
20.8
|
20.0
|
| Separate |
262.4
|
22
|
20.8
|
20.0
|
|||
|
|
|
Bendix w/o ABS | Separate |
262.4
|
22
|
20.8
|
20.0
|
|
|
|
ABS Bendix | Separate |
262.4
|
22
|
20.8
|
20.0
|
|
287.0
|
22
|
20.8
|
20.0
|
||||
|
|
|
Girling w/o ABS | Separate |
262.4
|
22
|
20.8
|
20.0
|
|
|
|
ABS Girling | Separate |
287.0
|
22
|
20.8
|
20.0
|
|
|
|
Bendix w/o ABS | Separate |
287.0
|
22
|
20.8
|
20.0
|
|
|
|
Girling w/o ABS | Separate |
287.0
|
22
|
20.8
|
20.0
|
|
|
|
ABS Girling | Separate |
287.0
|
22
|
20.8
|
20.0
|
|
|
|
ABS Bendix | Separate |
287.0
|
22
|
20.8
|
20.0
|
|
|
|
ABS Girling | Separate |
287.0
|
22
|
20.8
|
20.0
|
|
|
|
Girling w/o ABS | Separate |
287.0
|
22
|
20.8
|
20.0
|
|
|
Girling w/o ABS | Separate |
287.0
|
26
|
23.8
|
23.0
|
|
|
|
|
ABS Girling | Separate |
287.0
|
26
|
23.8
|
23.0
|
| Rear Rotors: | |||||||
|
|
|
Live Axle | Separate rotor/hub |
281
|
9.6
|
8.9
|
8.4
|
|
|
|
Multilink IRS | Separate rotor/hub |
265
|
10
|
8.5
|
8
|
Brake Reservoir Seals. Here's an interesting old car failure, perhaps something to put on the 10 year list and/or an FAQ for bricks:
The brake fluid in my master cylinder reservoir kept going down slowly over a few weeks...wouldn't leak fast enough to tell where it was going so I just kept adding fluid and looking. Now I see it appears to be coming from the seal(s) between the master cylinder reservoir and the master cylinder. Since this type of construction seems to be more and more the norm (a lot of old cars had integral reservoirs but that weighs a lot more) this is something to look for. The seals cost about $7 apiece on my application (need 2) so it looks like a little job this evening--one of the few jobs no tools required, if I'm lucky and the reservoir is self bleeding...If I may add a bit of cautionary advice to this, especially for older cars where the reservoir may be becoming somewhat brittle:
Removal Tips and Frozen Parts. Replacement
is straightforward EXCEPT that you need high quality tubing nut flare
wrenches and you should soak all fittings with good penetrant like PB 'Blaster'
or 'Kroil' several times for a week or so prior to trying to remove. This
may save some of the fittings and hard lines that you might otherwise have
to replace due to frozen fittings. Often the copper tubing seizes in the
threaded fitting, a result of corrosion and the soft copper binding. Often
breaking the threads loose is the source of rounding or breaking the fitting
hex flats, while the line frozen in the fitting causes twisting and failure
of the line.. Usually, if I can break the threads free, I can get the fitting
loose from the line with persistent back and forth motion and plenty of
penetrating oil.
[Caveat:] I just finished replacing ALL
the metal brake lines in my 740 since I couldn't get the rubber lines off.
Soak before trying - but even on my '89 w/original lines I couldn't get
them off with a flared open end wrench (they still spread a tiny
bit and the old nuts weren't perfect) and rounded a few and the others
actually CRACKED off leaving the threaded nipple part inside the
rubber line. If youre committed to doing this (i.e., you don't
mind going through the hell I went through to replace the metal lines -
a lift would have at least helped greatly with the rear ones, but it's
the right front caliper lines that are the real PITA) then you can cut
the rubber lines on the car near where they connect to the metal lines
and then get a socket over what's left to help get a better grip at least
there. The big problem is the nut on the metal line. I did manage to get
ONE of them free by using PB and heating with a torch. BUT even after I
got them off the threads on the nipple weren't very healthy and seemed
to thread rather loosely onto the new rubber hose, so I replaced that line
too.
[Caveat:] DON'T USE A WRENCH that
DOESN'T FIT PERFECTLY!! If your open end wrench is spread, or if the fitting
is a slightly different size, don't proceed until you get a wrench that
fits right/tight. For the tubing fitting (flare) wrenches - here it is
worth avoiding the old dependable Craftsman wrenches - they are not thick
enough and will spread enough to round the nut. Buy a good professional
set - they will work a lot better, and even though they may cost more than
the Craftsman or other inexpensive brand, if it saves you one or two fittings,
they are well worth it. Also, if there is evidence of steel tube twisting
as you attempt to loosen, put on more penetrating oil and work it back
and forth a very small amount lots of times. It will gradually work
loose because the torsion of the tube inside the fitting will crack the
rust. Takes lots of patience, but almost always works.
[Tip from Mike Missailidis] I can
tell you that I successfully removed all six flexible brake lines without
ruining even one hard line or flare nut. How? I used a Mac Tools 11mm flare
nut wrench, started soaking the fittings once a week for two weeks with
PB B'Laster prior to doing the work and used a propane torch to heat the
fittings and let cool twice, spraying more PB B'Laster between heating
and cooling and tapping on the fittings with a small hammer. Even so, it
wasn't easy.
[Caveat:] To avoid grief, just cut
the metal line close to the nut and re-flare it at the end. Two new nuts
could be taken off of each short line you purchased and cut (available
in 12" lengths.) Im fairly sure that line has what is called a "double
flare". I remember that it can be duplicated with a normal flaring
tool but takes a bit of talent and practice. It involves a two step procedure.
You need a special double flaring tool to do the lines - the normal single
flare tool will not do the job. And even with the tool - it takes a bit
of practice to get them to come out right consistently. It is a lot easier
to use the tool on the bench than it is under the fender of the car on
the end of the brake line. It is well worth spending a few hours
with penetrating oil and careful working back and forth of the nut than
to try to repair a broken line.
After replacement, the entire brake system
will require flushing/bleeding (Use pressure bleeder like Eezibleed).
[Diagnosis 2:] Your problem might be the same as on my '87 745 TGA: the guide pins on your calipers may have worn, which makes them rough, and causes them to grab the pads and hold them against the rotors. Voila, premature pad and rotor wear, as well as poor acceleration and gas mileage. The guide pins are a fairly inexpensive fix, and the difference on my wagon was attention-getting.
[More comments:] The lower bolt of the front caliper is used to take the brake apart. In this lower end, a bushing is fitted into the caliper. Mostly this bushing shows corrosion and can not be moved any more in the caliper. If this is so, the brake performance decreases as the two calipers cannot press the disc properly. To inspect the functioning of the brakes: take the brake pads away, and mount the caliper again WITHOUT the brake pads. Fix and tighten the lower bolt. You SHOULD be able to slide the caliper left and right by hand without difficulty! If not, the bushing is sticky. [Diagnostic note: I have found that a damaged lower guide pin is easily detected. One may not need to completely reassemble the caliper to perform the check. If the guide pin is badly damaged, as mine was-is, the lower guide will be frozen in place with no in/out play.] Slam the bushing with an appropriate tool (a 13mm socket) out of the caliper. Lots of force may be required if this bushing has not been removed for long time. Clean bushing AND inside caliper with fine sandpaper. Put copper grease on the bushing and slide the bushing inside the caliper. This should be possible without force. Make sure the upper bushing performs well, but mostly this is not a problem. Mount the caliper without the brake pads, and check if the unit slides easily left and right. (Lower bolt to be fixed). Re-mount the brake pads. Mount the wheel and spin it around. Put some Locktite on the thread of the lower bolt and tighten the bolt just before the brake starts 'squeezing', or stopping the wheel from spinning. (I guess about 15..25Nm is required to tighten this bolt). [Assembly note: A common cause of damage to the lower caliper guide pin is over-torquing the guide pin bolt. The correct torque setting for the bolt is relatively low, on the order of about 25 ft-lb. (Check the manual!), and it is common to over tighten the guide bolt when replacing brake pads.]
[Cautionary Note:] Repairing or rebuilding a stuck caliper guide pin may not cure the problem of pulling under braking. Anything that causes a major mass to suddenly shift under braking can and will cause the car to pull. Examples of things that can cause this are worn or broken engine mounts and worn out suspension bushings. So, when you're working on your Brick's brakes, check the condition of the motor mounts and suspension bushings. You may find that you need more than brakes. Of course, this makes a perfect excuse for a set of IPD bars as part of the suspension rebuild.
[Note on Volvo repair kit: Volvo has available
a repair kit for the lower caliper guide. Cost for the Bendix version is
approximately $30 US. Repairing the damaged caliper guide with a kit may
be preferable in some circumstances for some owners. The heart of the rebuild
kit is a new guide pin with a different design from the old one. Actually,
there are two guide pin rebuild kits: one for the lower guide pin only,
and one for both upper and lower. The lower guide pin is the one that is
most often jammed. To determine whether either of the guide pins are jammed,
remove the wheel and brake pads, and pivot up the caliper. The caliper
should move freely and easily back and forth on the upper guide pin. The
lower guide pin should easily move in and out. If a guide pin is stick
in position, it needs to be repaired or replaced. Since the rebuild kit
for the lower guide pin is only around $25, I recommend it.]
In the Girling front brakes there is a retainer cage that fastens to two "ears" on the axle assembly. There are 2 hex socket bolts that hold this retainer on. Then in the retainer are two sockets that each receive a locating pin. The caliper is bolted to these pins so that it is free to move sideways a centimeter or so. In my case one of these pins on each side was frozen and not moving. Thus when the brakes were applied the pistons were able to push the inside pad out but the caliper was not able to move in and pull the outer pad into firm contact. This caused noise and pulsing.
One locating pin was free to move, I could push it in and the grease seal bellows would push it back out. However the other was stuck. With about a half of an hour of twisting and prying I was able to remove the pin without damaging the retainer though the pin was trash. At Volvo I found that you can only by a kit, 4 pins, 4 bellows, 4 caliper holding bolts and a tube of grease for $98. I objected but bought the kit.
Reassembly was simple though I did clean out the pin sockets and polish the ID with Scotchbrite on a stick on a hand drill. Reassembly was simple with a liberal supply of grease and properly fitting the bellows. Then locating the brake pads and slipping the caliper over the pads and fastening the caliper bolts to the locating pins. Since these pins are free to rotate a thin 13mm open end wrench comes in handy to restrain the pin while tightening the caliper bolts.
Since I had the pins I decided to check the other side. I was not so fortunate, one pin was stuck so hard it twisted off and I had to get a replacement retainer, $10.
My recommendation is that when replacing
pads and or disks you check both retainers by pushing them to the outside
of the car. If they do not move freely remove the retainer (2 hex socket
bolts) and get to a vise where you can work the pins out. Replace the pins
and bellows. Even if the retainer moves smoothly it might not be a bad
idea to remove the pins, careful not do damage the bellows, clean the socket
of old grease and any water and relube the pins. I suspect the grease is
a silicone as it is water white (about like KY).
As you and the others notes, a much more likely cause for front brake rattling noise is a broken anti-rattle spring on one of the brake pads. You can inspect these without removing the pads. If you're going to change the pads you should always pop the dust covers, clean and lubricate the caliper guide pins using high temp silicon grease. Use the same grease between the back of the pads, the stainless anti-rattle plates and the piston faces to help minimize any tendency for your brakes to squeal. If you've got ABS, now is also the time to clean up the tips of those sensors (check the 740 FAQ and archives for notes on this).
Once in a blue moon you should probably
remove the caliper to check each guide pin in its bushing -mine wiggle
a little and this is probably normal, but slop is not. This gives you a
chance to properly clean and lube the guide recess. Shoot with spray brake
cleaner and use a small round wire brush or something like a child's toothbrush
(clean thoroughly before giving back to child). When removing a caliper,
hang it up with a length of coat hanger wire to prevent damage to the brake
lines.
Brake Rotor Pulsation: Causes.
[Comments from Wagner Brake div. Of Cooper Industries:] Brake rotor thickness
variation causes brake vibration due to changes in the braking force as
thick and thin portions of the rotor pass between the pads. Eric Smith,
Senior Instructor for Wagner Brake at the Moog World Training Center in
St. Louis, says technicians sometimes pin the blame on a defective rotor,
but often it's due to excessive system run-out, which has not been checked
by the technician.
Smith says the run-out will cause the
rotor to wear itself out of parallel, and is why turning or replacing the
rotor won't solve the problem. System run-out can be caused by poor mating
of flanges between the hub and rotor when assembled as a unit ( by excessive
rust, preventing a clean fit of the rotor on the flange), excessive run-out
and even improper torqueing of the wheel bolts. Once the rotor heats
up during operation, if one lug is a little less tight that the others,
the rotor will expand at that point and cause run-out, says Smith. Compounding
this is the fact that the brake might only have run-out when the rotor
is hot. When the customer takes the car back to the shop, it's
cooled when checked by the technician and by that time the run-out disappears.
If not corrected, though, it will eventually have a permanent run-out,
and be worn out of parallel.
Make sure rotor run-out is below specifications
before reinstallation; also make sure the hub is clean and rust free before
installing the rotor. System run-out should be checked after installing
the rotor (new or turned). If run-out is above spec, the solution may be
as easy as re-indexing the rotor one stud at a time, until run-out is within
spec. It may also be necessary to replace the hub assembly.
Brake Rotor Identification. [Tip from Larry Jacobson] When I bought front disks for my '91 744T the Volvo dealer said there are three disks that are stock on that car and they all look the same. The only surefire way to get the right disk is to tell them the *exact* diameter and then they can match the part. When disks are bought from an aftermarket source it's a crapshoot unless you haul in the old part and carefully compare it to the new part.
ATE Power Disks. . [Tip
from Chris Mullet ] I picked-up a pair of front 10-1/4" ATE "Power Disk"*
rotors for my 740 from: Foreign Auto Parts
800-728-1601
Three months ago, they were $42 each.
Lets see...that's about....$84 for two (plus shipping)
This is probably common knowledge, but 740 rotors will warp like crazy if the wheel nuts are over-tightened and/or not tightened evenly. So if the shop tightened it with an air wrench w/o a torque limiter, you might have the source of your troubles...
About rotors and warping ---If you see someone use an air wrench on your lug nuts when installing your wheels - warped rotors are just a few miles away. Our 1988 760 has gone through several sets of rotors. (Way too many) The problem has been solved since I now insist on a torque wrench being used after the lug nuts are hand tightened. Current rotors have over 40,000 miles and are living well. When you have work done at a tire shop they are there to do what you need done, not what is the fastest for them. (Let them use the air tools on someone else's car)
As for turning rotors - Forget it. If you
look at the machines most shops use to do this work they decide where to
clamp the rotor down by eye-ball. When it goes back on the car it is usually
worse than when you started. And when you get new rotors - DO NOT let anyone
turn them before installation in order to "true them up". They are new,
and in the best condition they will ever be in. Don't let anyone screw
them up before you ever use them.
Discussion on Uneven Pad Wear. [Tech
Tip from Wagner Brake] While inspecting for excessive pedal travel, brake
linings appear worn in a tapered pattern, even though the pads have not
reached minimum thickness. SOLUTION: Uneven pad wear is not normally
related to excessive pedal travel, but it's not unusual to discover one
problem while investigating another. Linings with tapered, uneven wear
should be replaced if the difference in thickness from one end of the pad
to the other 1/8 inch on floating calipers. This remains true even if the
linings have not reached minimum thickness because this condition can result
in pads becoming wedged in the caliper. If the pad that contacts
the caliper piston is worn much more than the one on the other side of
the rotor, something is interfering with the necessary sideways movement
of the caliper. This may be corrosion, contamination, or improper assembly.
Possible causes of excessive pedal travel are low fluid level in the reservoir,
air in the hydraulic system, an open bleeder screw (avoid the use
of Teflon tapes or pipe thread sealants which do not help seal and may
cause contamination), improperly positioned pads,
, piston seal damage
in one or more of the calipers, a leak past the piston cups in the master
cylinder, excessive rotor runout or a bent rotor and bad or excessively
loose wheel bearings.
To Install:
- Get some Permatex Brake Anti-Squeel.
This still comes in a package with two pouches. Each is enough to so an
axle. Apply liberally to the back of the pad. This will stuff is very tacky,
and will "glue" the pads to the calipers and prevents any squeel. This
is far more effective than the lubricant anti-squeel solutions sold.
- Apply some anti-seize on the pins and
insert them. Don't forget the clip. The first pin will so in very easily.
The second pin will be a minor pain since the clip is in place. I usually
use some pliers to help line it up with the receiving hole and then tap
the
pins in place.
-[Editors Note] Remove the caliper
guide pins, lubricate with synthetic brake grease and reinstall.
Check boot condition.
- Install wheel
- Be sure to seat the pads correctly.
This is very simple and there should be instructions with the pads. Basically
take the car up to 30 MPH and stop with even pressure. Repeat a few times.
Front Brake Pad Replacement. [Tips
from Andre] Remove:
- remove wheel
- remove the two bolts on the back front
side of the calipers. You can now pull the whole assembly away from the
rotor. due to wear, the old pads may get slightly stuck in a groove. Insert
a large screw driver between the caliper and the rotor and lift... it will
come off pretty without too much trouble.
- The outside retainer of the pads slides
out. The pads can be removed.
- Push in the piston to make room for
the new pads.
Install:
- Install Permatex anti-squeel to back
of pads.
- Install pads
- Re-insert clip if it came loose. You
can get it lined up in the holes with pliers, and give it a gentle tap
with a small hammer to seat it in place.
- Lubricate the caliper guide pins and
inspect the rubber boots.
- Slide the whole assembly over the rotor
and insert the bolts back in place.
- Be sure to seat the pads correctly.
This is very simple and there should be instructions with the pads. Basically
take the car up to 30 MPH and stop with even pressure. Repeat a few times.
Additional Replacement Tips:
[Query:] Any hints on front/rear brake
pad replacement? [Response:] Be sure to remove the sliding pins on
both front calipers. Inspect them and replace if worn or badly rust pitted.
Otherwise, clean them, grease with silicone based brake grease, and reinstall.
Clean caliper sliding surfaces with small wire brush and blow clean (use
a mask!!). Check to see if new pads are beveled on leading and trailing
edges. If not, consider putting a 45 degree bevel on them. Use the
brake grease on the backing plate, the anti-squeal plate and the edges
of the backing plate that contact the caliper. Install the pads carefully
so that the anti-rattle springs do not get broken (the springs on the new
REPCO pads are much heavier than the earlier pads, so should not break
like they did before).
I prefer the plain stainless backing plates
rather than the black rubber coated ones. The rubber, though it may be
thin simply adds a bit of softness to the pedal feel, as does any of the
'rubbery' anti-squeal treatments. I have found that just using the Volvo
brake grease seems to solve the squeal problem as long as you clean rust
off the caliper contact and sliding surfaces. The backing plates
should have some slots or holes in them - creates a slightly of center
contact surface for the pistons which apparently helps prevent squeal.
Volvo DOT4+ Brake Fluid? [Query:] My friendly Volvo parts person says that my '98 S90 needs DOT 4+ brake fluid, which I don't doubt. Of course dealers use Volvo-labeled fluid. Is this the same as (or equivalent to) Castrol GTLMA which "Exceeds DOT 3 and DOT 4 specifications"? Also how does one flush the fluid on an ABS system? Same as the non-ABS systems? [Response: Bob] The Castrol fluid is fine as long as it meets DOT 4. Use a pressure bleeder or Vacuum bleeder from calipers. [Editor: See Brake Fluid Comparison for more information.]
[Maintenance Note:] The only place where
water may come into the system is the hole in the filler cap over the master
cylinder. This breather hole is necessary and always lets atmospheric moisture
in. It is more serious if one uses a pressure cleaner to clean the engine
compartment without protecting the master cylinder cap.
Brake Bleeding Sequences. [Editor's
Note: These sequences apply to all cars per the Volvo manual]
Bleed the brake lines in this order:
[Query:] I've never bled calipers that
had TWO bleeder valves --- What is the bleeding order? Is is
special for the 740 wagon? It is a 91 and it has ATE on the rear, no problem,
but dual Girling calipers (?) vented rotors on the front w/ two bleeders
ea. The Chilton manual is not helpful with the dual system.
I can't find any other repair manual for the 740. [Response: Steve
Seekins] An interesting dilemma - the manuals vary on the correct bleed
sequence. According to some, when you have an inner and outer bleed screw
on a caliper, you should bleed the outer first, then the inner, however,
my engineering sense would tell me to do the inner (closest to the MC first,
then the outer. That way no old fluid or air would get into the outer after
bleeding it. In any event, I suspect that it is not critical, and I always
recommend going around twice - first time until all air/old fluid is out
of system, second time to check for any air. Expect to take about 1.5 quarts
for a complete system flush. On the non-ABS systems, it is pretty clear
that the LR is first, but on the ABS systems, manual says to do the fronts
first, then the rears. [Editor's Note: when bleeding, use the uppermost
nipple to expel any air. When flushing fluid, use the lower nipple,
then close and check the upper nipple for any trapped air. See Brake
Fluid Flushing Procedures]
ABS-Equipped Cars: See Brake
Fluid Bleeding/Flushing Procedures for Cars with ABS
I received a number of inquiries about the brake bleeder and not having a lot of confidence in net graphics I'll try to describe the setup with words. If it is not clear or if you have questions, just drop a note. If you are hopelessly befuddled by my directions, give me a mailing address and I'll send you a diagram. Here goes:
PRINCIPLE: Push fluid into the reservoir at pressure to force the old fluid out the caliper nipples rather than suck it out from the nipples. Brake systems are pressure systems and are better able to deal with even this small pressure than a vacuum system which will always suck a little bit of air in at the nipple.
PARTS:
A: 1 each-- 1/2 gallon heavy duty (Nalgene) plastic tank. I bought one from Hudson Bay Outfitters, a local dealer of outdoor equipment. They had many different styles and shapes. My criteria were a) a good tight seal on the screw cap, b) very solid construction, and c) a relatively flat surface area on the top where I could mount a metal tire valve. The dimensions of the tank I bought were 8"(h)x6"(w)x3"(d). I think it is most important that it be sturdy and that most of the volume be air rather than fluid so that the pressure remains relatively constant during the bleed, I use Ate Super Blue and put about a half quart in the tank. This tank was the most expensive part ~ $9.50
B: 1 each-- 1quart tank into which old fluid is collected. You have probably used a form of this in the past. At the same same outfitter store I got a lighter duty quart jug for this purpose, put another tire valve in the cap, drilled the valve out with a 1/4" bit, and ran a 5/16" hose from the caliper nipple over a short section of stiff 1/4" tubing which goes through the valve and down into the tank. A very small hole drilled into the cap next to the valve will allow air to escape. No more catching fluid in a wine bottle, if this one falls over it is no problem, because for all intents and purposes it is a single piece.
C: 1 each-- Nalgene cap to temporarily fit the top of the reservoir in place of the existing one with the sending unit. I found a Nalgene cap about 1 3/4" in diameter which fit my old 633 perfectly (a tight fit here is essential). This part may take some trial and error and the cap from one reservoir may be different from another.
D: 2 feet of 3/8" OD x 1/4 ID vinyl hose-- to go from A above to the cap C.
E: 2 feet of 5/16" OD hose to drain the fluid into B.
F: 9" of stiff 1/4" OD tubing to fit inside the tank A from the drilled valve down to a corner in the tank (take a look at the pesticide tank in your garage if you can't visualize this).
G: 4 metal type screw valve stems-- I bought them at Track Auto, drilled out three of them as described in B above. The fourth one is mounted in the cap of A above and is used to pressurize the system (in other words don't drill this one out).
CONSTRUCTION:
Drill out three of the four valves with 1/4" bit (be careful and use a vise). Drill out all three caps to accept the valves as well as a spot on the shoulder of tank A. Mount undrilled valve in cap of Tank A. Insert 1/4" stiff tubing into bottom end of one remaining valve and mount valve on shoulder of Tank A. Mount a remaining drilled valve into hole in cap which mounts on reservoir. Put 3/8" OD hose on the two valve stems just described. Collector tank construction is described above. I have a small electric pump but a hand pump will do. I wouldn't pressurize above 10 to 15 psi. Larger hoses will improve flow and a stop cock valve allows you to fine tune your setup but is not necessary. A local observer suggested a strap for the reservoir to ensure your reservoir doesn't decide to lift off, another unnecessary precaution in my experience. You don't have to do anything while it is bleeding (as usual, one at a time), but you might try applying a bit of pressure to the brake pedal to get things moving.
OPERATION:
Put about a half quart of your favorite fluid into Tank A and tighten lid. Replace cap on reservoir with Cap C and make sure you have a good seal. Pressurize Tank A, look for leaks (I have never found any) and open your caliper nipples in the traditional fashion. After you are finished, release the pressure in the tank by pushing down on the valve release... then remove the caps. Have fun.
ANOTHER SOLUTION:
I have NOT tried the IPD system but have tried a similar vacuum device and it didn't work very well for me. What did work well was to take an old brake line, put a hole in a spare master cylinder cap that the threaded portion would fit through, put nuts and washers on both sides (inside and outside) tight enough to seal, and apply about 15 - 20 psi compressed air to the reservoir, making sure that both parts always have plenty of fluid in them. (If one runs out, you get to start over.) Then you can bleed in the normal sequence and the pressure stays constant on both sides so your isolation valve doesn't activate and confuse you.
YET ANOTHER SOLUTION:
Buy a Gunson's
Eezibleed, approximately $35 incl s/h.
1. Eezi-bleed Brake Pressure Bleeder:
[Editor's Note: purchase from IPD at http://www.ipdusa.com][Query:]
How well does Eezi-bleed work? [Response:] Eezibleed works great
- I have found that 25 psi works fine vice the recommended 20 psi. If you
use pressures recommended (~20psi), you will not be in any danger of blowing
off the fluid reservoir. I routinely use 25psi with a pressure reducer
and have never had a problem. Just don't try to hit is with a spare pumped
up to 45psi, or hook up to a 150psi air hose! In this case, it will surely
come apart somewhere! Only drawbacks: under heavy - i.e., daily use,
the gaskets on the reservoir bottle got funky and required replacement,
as did the gasket on the master cylinder reservoir adapter cap. After a
lot of heavy use and regular cleaning of the system after use with brake
system cleaner, I found that the gasket on the adapter cap seemed to have
expanded and would not lay flat in the cap - hence I had trouble sealing
the cap. Also, after lots of use, the adapter cap failed and
began leaking - threads would not hold. The cap itself seemed to
either wear or stretch such that the threads would not hold tight and would
slip. The result is that there was a very fine line between tightening
the cap and having the cap pop up one thread resulting in lots of fluid
(like a whole container) being blown out around the cap threads. My solution
was to purchase a machined aluminum adapter cap from a local automotive
tool supply house for about $30 and use it in place of the supplied adapter
cap.
For complete system flushes, I find that
the supplied reservoir bottle may be too small. However, for the
owner with 1-4 Volvos that get flushed every 1-2 years and the occasional
new master cylinder or caliper, you can't beat the $30 price for the system.
You will never go back to the pump and bleed or vacuum bleeder systems
again. For serious use, I built a similar system with a commercial
machined aluminum adapter cap and quick connect fittings, a larger Nalgene
reservoir bottle, a pressure reducer and connections for an air compressor
tank. The Volvos cannot be gravity bled, and even with the pressure
bleeder, you may need to use the pedal occasionally when bleeding the rear
brakes on those cars with rear brake pressure limiting valves (non-ABS
systems).
[Response 2: Martin Landusky]
The system is very easy to use, just as it says in the instructions. I
used my temporary spare with about 26 lbs. of pressure in it and hooked
up the system to the reservoir to test for any leaks. After I found none,
I added the fresh brake fluid to the EZ-Bleed system and reconnected. Then
I followed the bleeding sequence in the manual. Careful not to round off
the edges on the bleed nipples when you open them up. I just used a regular
open end wrench and it worked fine. It doesn't take too much bleeding before
the fluid runs clear. Close the nipple and go on to the next one (have
your car up off all four wheels). Check the EZ-Bleed fluid container after
bleeding a couple of lines and keep it topped up. That's it and basically
it's that simple. [Response 3: Paul Seminara] Ignore the 20 psi warning.
You can and may have to pump the brake pedal (1/4 stroke or so) get the
rears really good and a rock hard pedal.
[Tip from Steve Seekins] I have had a few complaints and problems with EEzibleed. Specifically, the adapter cap provided is a 'universal' cap designed to fit several different threads including the ATE reservoir used on the Volvos, BMWs, and others. However, because the threads do not fit precisely, I found that the cap would not screw on tight and eventually, it blew off under pressure with the resultant brake fluid mess all over the engine compartment and fender - lots of rapid washing and cleaning involved to get it off the paint ASAP (brake fluid makes great paint stripper!). The other problem is the small size of the fluid reservoir - doesn't hold enough to do a proper flush of the entire brake system.
2. Power-Bleeder Brake Pressure Bleeder:
[Tip from Steve Seekins] I recently
received, tested, and reviewed a new product - Power Bleeder from Motive
Products: http://www.motiveproducts.com/
The price is about the same, however it comes with a specific ATE reservoir
cap adapted with a fitting and hose, has a large bottle which holds 2 full
quarts/liters of fluid sufficient for a complete flush, and has built in
pump and pressure gage. [Editor's Note: this is a great product for
$39.95. They are located in Berkeley, CA.]
Master Cylinder Reservoir:
Rear Wheels:
Remove or press back pads on one rear wheel.
[Editor's Note: Clamp off brake rubber line and open bleed screw
on ABS-equipped cars so you don't force contaminated fluid back to the
ABS unit. See Brake
Job Tips: Hose Clamp.]
[Cars with multilink axles: Connect tube
to lower bleed screw on caliper]
Open bleed screw and drain off fluid until
it runs clear. Tighten.
[Cars with multilink axles: Close off
bottom screw and bleed top screw to remove trapped air.]
Repeat on the other rear wheel.
Reassemble.
Front Wheels:
[Cars with Girling Single-Piston Calipers:]
Conversion for Cars with ABS:
[Response: Abe Crombie] I have done
this to my parents' 88 764 turbo. It requires left and right calipers
from a 92-94 960 or 92-95 740/940. It requires two rotors. The hubs
are the same and the brackets on a complete caliper with slides/mounts
will bolt with no mods to your struts at the same attaching points. The
brake hoses are a direct fit to the newer calipers. I'm not so sure that
the bigger brakes will fit if you have 14" wheels though. All jumbo brake
700/900 have 15" wheels and there are some references in parts catalog
to differences in 91 and older with 14" brakes and 15" brakes. Their car
does seem to have better brakes and it has had no trouble with brakes in
the 50-60K miles since swap was made. I got all the pieces from a salvage
parts place from a front-end total that had no useable front suspension
pieces and had just arrived and had not been picked over.
[Query:] I assume all the 92+'s have ABS
as my '89 does? How are the rotors different (mine currently has the larger
of the two available sizes - do I still need to change)? [Response:
Abe Crombie] The offset of the "jumbo" brake rotors are different and you
will have to change the rotors as a result. The 95 to 98 960/s-v
90 are also different so don't get parts from one of those models.
Conversion for Cars without ABS:
[Further Comments: John Sargent] This conversion
applies to 700 series cars with non-ABS Girling brakes. It may work for
Bendix, but I don't know. These cars don't have ABS, and can't be converted
to the 900 series jumbo brake conversion described by Abe Crombie in the
700 FAQ on brakes. All 900 series cars that I am aware of have ABS, and
you can't install ABS calipers on a non-ABS car. These 700 series cars
without ABS originally had 10.25 inch diameter discs. The 87 and earlier
models were originally one piece disc and rotor, but many have been converted
to 2 piece hub and rotor. If you have an 88, or later, you already have
2 piece hub and rotor. All you need are the caliper holding brackets from
a 700 series with Girling ABS brakes (all ABS brakes appear to be 11.25
inch dia.), or the caliper holding brackets from a late model 700 series
with the large discs, and new 11.25 inch diameter discs. You will use the
same part number pads, but get some new ones. Remove the Girling caliper
from your car. Now remove the caliper holding bracket from the strut, and
discard it. Remove and replace the disc. Install the new caliper holding
bracket from the donor car with Girling 11.25 inch diameter brakes. Reinstall
the caliper with new pads. Wheel nut torque (63 ft-lbs) is very important
on these cars. Uneven torquing will contribute to brake pedal pulse, and
uneven wear of the disc.