960-90
Series Information
FAQ
Home Volvo
Maintenance FAQ for 7xx/9xx/90 Cars
Version 5.0
Volvo
Maintenance FAQ for 7xx/9xx/90 Cars
Version 5.0
[Editor's Note: See specific functional areas
for more information about particular 960/90 systems.]
960 Valve and Head Problems.
[Summary of tips from Tom Irwin] To avoid the sticking
valve problem, which causes valve and piston collisions and consequent
head meltdown, follow carefully this advice for 960 owners from Mr. Barrington
of Barrington Engine of LA, rebuilders of many toasted 960 heads:
1. The Abe
Crombie Tune-Up is a GOOD thing!
2. Put a fitting behind the AMM
for occasional, brief WATER introduction to the Hot engine...while
running Shatters and blows away
the carbon build-up.
3. ALWAYS ALWAYS use PURE SYNTHETIC
OIL! VERY insistent on that one!
Leaking Cam Timing Sensor.
[Query] The cam timing sensor on my 960 is leaking oil when the engine
warms up. I have checked the location with a telescope mirror and is not
from the seal around the block. Could it be an inside seal?
[Response: Abe Crombie] There is a seal deeper in from cam sensor.
It is a bear to reach. Go to dealer, they have a tool that presses it in.
There is no room to tap it in with engine in car. The shutter wheel must
be put back correctly also.
Porous 960 B6304 Blocks.
[Tip on used car purchase: Kelvin Kean] We purchased a 92 960 station wagon
in 1985 with about 30,000 miles from a Volvo dealer. In the summer of '98
the coolant started needed topping up about once a week. By October, it
needed two quarts a week. After removing the exhaust manifold our mechanic
found the leak, a line of pinholes in the side of the block. He attempted
to seal the leaks using a compound often used by truckers to seal small
radiator leaks. The fix lasted a week. From then until January, we used
the car but had to add increasing quantities of coolant to the radiator.
In January we took the car into our mechanic and went through five gallons
of water keeping the radiator from boiling over. When the mechanic looked
over the engine block again, oil was now bleeding from an identical line
of pinholes on the same side of the block and parallel to the line of pinholes
leaking coolant. The engine block is defective. There is no fix short of
replacing the entire block, which means an entirely new or rebuilt engine.
And this failure is a fundamental failure in manufacturing or design. It
has nothing to do with the maintenance or care a car has received. No engine
block should ever leak coolant or oil short of a million miles! We've
contacted Volvo of North America and their position is that the warranty
has expired and that besides we did not have the car serviced at an authorized
Volvo dealer. We are now in the process of filing a formal complaint in
court against Volvo and its dealer. Within the last month, our Volvo
mechanic has had another 960 station wagon towed in that was leaking coolant
even worse than ours. Volvo has also given that owner the run-around, but
he did get a member of the staff of Volvo North America to admit that they
had heard of "...four or five..." 960's having the same problem.
[Response: Tim] Click and Clack the tappet brothers had a caller a few
weeks ago with a similar problem. Seems there are problems sometimes with
the castings on the 960 engine.
[Where They Fail: Tom Irwin] The
960 failures always occur directly beneath the exhaust manifold.
Early 960 B6304 Cautions. [Tip from
Tom Irwin] The early run '92's, maybe 10,000 units worldwide had metallurgical
and dimensional deviations. That was corrected quickly and all subsequent
castings have been more or less to print [But see the update below!].
Having said that...let's address the coolant.
I have been told by reputable sources
at Volvo that anything other than Volvo Blue, Type C coolant could begin
to attack the block alloy with time. This reaction is accelerated as the
coolant degrades. (Note, this applies to aluminum, modular engines, B6304,
etc.) Naturally, if you have one of the early 92's this chemical
reaction could damage the block faster. The same source also cautions
against using anything but Volvo Brake Fluid due to the potential for reactive
damage within the ABS pump.
[Update Notes from Tom Irwin:
There are two TSBs addressing this issue, 221943 in March, 1997 and 221945
in June 1997. The one from March 97 was superceded by an internal document
dated November 1998, that was a Service Bulletin, titled as a "troubleshooting
procedure". Here is the BAD NEWS guys...it covers 960 from 1992 through
1994... they went cheap even at that stage and authorized only a
block swap with some incidental parts...the original engine gut pack had
to be swapped. They called it a "defect" and allowed 20.4 hours for the
swap. [Further reference:] Internal Volvo Warranty Claim Documents
address block casting porosity issues in one document as a 1992 ONLY issue.
The
second internal document, Volvo tech paper
2120-001, covers block replacement, under warranty for 1993, 1994, and
1995+ 960's. This references block numbers 25000 to 52873.
[Finding the Block Number: Tom Irwin]
Under the exhaust manifold in the webbed casting. Use a mirror and light.
Or, Underhood, front body stretcher in front of radiator on your left.
Riveted aluminum placard, Right column, top line, last 5 digits.
[Editor's Note: Too many reports
of casting porosities in 92-95 B6304s have appeared on the Brickboard to
dismiss these as related to a short run of early blocks. If you are
considering buying a 92-95 960, do some serious investigating and take
a hard look at the engine block for coolant leaks, patches, attempted repairs,
service records, etc. to pin down whether the car has this problem.]
B6304 Compression Test. [Query:]
Anyone know the correct procedure for disabling the electronic ignition
and whatever else is required to check compression w/o damaging anything.
[Response: Abe Crombie] There is a terminal in that electrical box on driver's
side under hood. It is a single terminal that points up with nothing plugged
to it. 12V will trigger starter. w/o key on and all coils and plugs removed
and throttle opened while cranking you will safely, accurately get a comp
test result that is valid. Warm engine also.
960 B6304 Intake Manifold Nut and Gasket
Problems. [Tip from Jim Bowers] My '96 960 with 66K developed
a rough idle last week. My friendly Volvo service mechanic suggested it
was most likely a bad intake manifold gasket when I took it in to have
the codes pulled. (I don't have a scanner yet.) So I armed myself with
parts and this past week end I tore into it. I fashioned a diagnostic tool
for pressurizing the intake system with 4 psi and the problem was easily
confirmed to be the intake manifold gasket. When I took the manifold off
I found several of the bolts to be less than finger tight!!! The gasket
had sucked in and bulged out at the number 1 cylinder. The new Volvo gasket
was of considerably higher quality construction than the old one so it
may have survived even with loose bolts. However, I may have avoided
the considerable project if I had tightened the bolts when I first got
the car last summer at 58K! With that background I also pulled back the
heat shield on the exhaust side and tightened the nuts on the exhaust manifold
nuts as well. Most were still tight but 3 or 4 turned up some. One turned
up a full half turn!
960 Fuel Filter Change. [Query:]
Can someone outline the procedure for changing the fuel filter on a 1995
960. I plan to remove the fuel pump relay, run the car till it dies replace
the filter, and put the relay back. Does that sound about right? I noticed
what appears to be some sort of pressure relieve valve on the line in from
the tank to the filter. Is this valve used when changing the filter? If
so how? Also do I need a special tool for disconnecting the lines from
the filter? [Response: JT Charger] Leave the fuel pump relay alone.
After unbolting the fuel pump bracket, simply squeeze the rubber connectors
back while holding the fuel lines. Its like connecting an airhose to an
airgun, spring loaded, compression fitting. The other fitting
you see in the fuel line is for us superstar technicians to check fuel
pressure with. Leave it alone. Put rags under the old fuel
filter before disconnecting the lines, to soak up the normal spillage,
perhaps use a pan.
960 Automatic Transmission Questions.
See the FAQ file for Auto
Transmissions for more info.
960 Coolant Loss: Coolant Reservoir
Cap at Fault. See link.
Timing Belt Changes. See
960 Timing
Belt Change for important information regarding the timing belt change
interval, which varies by model year for the 960 series.
960 Rear Cam Seal Repair.
[Long, Involved Tale from Tom Irwin] First, many thanks go out to
Steve, Abe and the other generous tipsters without who's help I would have
had a bit more difficulty. .
OK, the heater hoses are in the way so
in preparing to disconnect and remove them I drained ~6 litres of coolant
from the petcock on the Ex. side of the block. Make sure you have a jug
of Type C Blue sitting around before you start, if you choose to do it
this way. Well, then I noticed that with the coolant drained, the
hoses became soft and flexible enough to be squished back/down out of the
way. So I did that and left them connected.
Don't even think of doing this job without
a telescoping inspection mirror, preferably a self-illuminated one.
The 2 T-40's that hold the cam sensor housing
to the head...these are BIG mamajama's! They are made of soft metal and
are easily deformed. And I promise you, they are frozen in their threads.
Breakaway torque is considerably stonger then the set torque values. **CAUTION**
if you strip or otherwise wreck the bottom T-40 fastener, you will likely
have to PULL THE ENGINE to complete the job...'Nuff said.
Also, DO NOT use an El Cheapo T-40 driver
bit either...if it comes out of a kit with a bazillion other parts...uses
different adapters to connect it to a plastic handle and says "made in
China"...GET THEM OUT OF THE WORK AREA..
Luckily, I went after the top T-40 first
and the bit yielded under load and wrecked the head of the T-40!! Because
it was the TOP one I was able to grab it hard with a monster vise-grip
and bust it loose, after which it spun right out, no problem. My
wife went out and got me a hardened, impact grade T-40 x 3/8" ratchet drive
bit. Made ALL the difference! Even after I cheezed up the lower one a little,
this quality bit grabbed it's target and brought the lower bolt out.
The Cam Sensor cover may be a bit gummed
up with oil residue, so it may want to rotate a bit instead of withdrawing
from the head. Fine! Rotate it CCW a bit and you can tap the upper and
lower mtg. ears with a drift and light hammer alternately, until it walk's
out. Set this aside.
Remove the 10mm bolt that retains the "shutter
wheel" this is kinda like taking out a rotor from a distributor housing.
no problem. Set the shutter aside. Wipe out the pooled oil.
If you are smart you'll have a seal picker
kit with many different parts to make many different articulated angles...you
will need them. If you are *me* you'll waste an hour sacrifice two craftsman
screwdrivers in a vise with an Acetylene torch, trying to fabricate the
same thing. For the record, the smaller one worked better. Use a Dremel
tool or equiv. to de-burr and hone the business end of this thing so as
to not damgage any sealing surfaces.
Now is when you MUST have an inspection
mirror. Get on back there, work carefully as you are working a mirrored
image. Hook that sucker under the garter spring + up behind the metal ring
and it pops right out real easy. Wipe the cavity out again and reinspect
the sealing surfaces for damage.
Lube up the new seal with... I dunno...I
used heavy weight petrolatum..and ease it over the cam shaft. Try and jam
several fingers back there and push evenly on different point on the seal.
Make sure it doesn't cock in the bore. Stop and use your inspection mirror
frequently to check it is even. To bring it home...again, if your smart,
you'll find a way to get a hold of Volvo Tool P/N 999-5450. It has a perfectly
dimensioned steel cup with a hole in the back to put your cam shaft shuter
bolt thru temporarily to tighten the cup down and push the seal in to place.
If you are me, you'll hack a piece of nylon bar stock at work and while
the prototype machinists are on break and "borrow" a CNC Vertical Mill
and fabricate same based on Seal dimensions and your best guess from a
picture in the service manual.
Anyway, my best guess was about .250"
off, but before I ran off to get a longer bolt, I put both hands on it
and squeezed it against the head and ... "Whump" it popped right in.
Check it again with the mirror for even seating.
Put the shutter + 10mm bolt back in. Fit
the tabs squarely in the milled slot on the end of the cam. Tighten.
Clean the rim on the sensor cover and
gently fit it over the shutter wheel being careful not to damage
the magnetic pick up chingas inside. Align
the holes and replace the T-40's.
Fill-up your coolant. Take a Prozac.
Start your engine. Check your work.
960 B6304 Cam Gear Timing.
[Query: JT] I removed the cam gears from the head of my 960 and now
can't figure out how to get the gears back on with correct alignment so
the cams and valves are timed right.
[Tip: Tom Irwin] Make sure and scribe
the bolt positions on the gears before removal. There is an awful lot of
adjustment in there.
[Self-Diagnosis: JT] I took a look
at the 960 again last night and I cam up with a way to solve the problem.
The problem was that I took the cam gear off of the camshaft and did not
know that it was not pinned or marked. This meant that it could go on the
camshaft one of 3 ways at 120 degrees out of phase. With the intake manifold
and exhaust manifold off I could see the valves. Had to use a mirror for
the exhaust side. The spark plugs were out also. I set the timing marks
and hoped for the best with a 1 in 3 chance of getting it right. I did
not get any interference when I slowly turned the crank by hand, so feel
will not work. I checked the firing order and compared the exhaust valves
openings to the intake. Used a flashlight to shine in the plug holes and
look in the ports to see when the valves would open. I found that the cam
gear was off, making the intake and exhaust valves open and close at the
same time. This is why there was no interference. So the intake valves
were opening to soon. So I went back 120 degrees to the next hole and retested.
This time the timing was correct. I then marked the cam gear to the camshaft
so I would not have this problem again. So all you 960 owners out there
be careful with the cam gears. I do not know but the 850s may be the same
way.
[Response and Caution: Jim Bowers] The
Volvo tools to set the cams cost about $250. There is a tool for locking
the crankshaft in position, about $50, and one that attaches to the back
ends of the cams, almost $200, and puts everything in sync. In addition
to the three possible choices with the holes in the gear/pulley, the holes
are elongated so you still have several degrees of choice once you get
the correct holes lined up. The car will probably run, but will not be
set at factory settings if you don't use the tools. Maybe you can find
a place to borrow the tools? Or, once you have it in running condition
get to a dealer and have the timing set. I just ordered a set from Kent-Moore,
the Volvo tool supplier. Same tools are used for the 850 and probably
for the S40? All that having been said, you would have saved your self
a lot of hassel if you had spent the few $ to get the Volvo Service manuals
for the engine. One of the books I have (TP31714/2) takes you, in pretty
good detail, through changing a head gasket.
[Tip from Tom Irwin:] I've heard
the following is critical to re-assembling the head: bottle of gasket goo,
rollers and tension spreaders? The stuff I have is "Volvo #1161059-3,
High Temperature, Chemical Gasket", it comes in a 50ml tube.
960 B6304 Leaking Rear Main Seal.
[Query:] It appears the rear oil seal is leaking on moms 95 960 65k.
This appeared all at once. It seems to be coming down from the flywheel
ispection cover. I cant identify a drip while running but it pools while
sitting. She just had the oil changed then this happened. [Tip from
Rob Bareiss] The reason for the sudden blow out is... it's the same
rear main seal as an 850 engine. Which is to say, subject to unexplained
and sudden oily failure. I dunno, I can't really adequately explain
it. They just let go, it seems completely at random. We've just done
our 5th 960 rear main seal in the last 6 months, and I don't even want
to think how many leaky 850 rear mains we've seen- it's gotta be 30 in
the last year. At the minimum. I had 4 850's we sold this summer, everything
from 48K to 114K miles, and we bought the cars because they were blessedly
dry at the engine/trans split... and they came back, from 1-week to 2-months
later, well within our warranty period (lucky us!) having sprung leaks.
And I've had 150K mile 850's and 960's which have never leaked. I do not
understand it, or know of a fix or cure for it. I'm sorry it happened to
you- hope it doesn't dim your opinion of an otherwise great car. If you
were to bring it to my shop, you'd be looking at ~$21 for the part, and
about 6.5 hours labor. And, be glad that went instead of the catalytic
converter....
960 B6304 Oil Pressure Problem: O-Ring
Problems. See link.
960 Oil Pressure Problems: Failing
Oil Relief Piston. [Tip from JT] As you know I have had
some problems with no oil psi after I got the 2.9l back together. I thought
that the oil pick-up was plugged with sludge or something. I know I did
not want to drop that oil pan so I figured that I had nothing to lose by
trying to clean the sump. I put in 6 quarts of the gunk parts cleaner (comes
in 3 qt cans) thru the dipstick hole and let it set for 2 days. When I
drain it the oil sump was spic & span! I flushed it with oil, then
tranny oil, and then with oil again. I then filled two caulking tubes with
mobil-1 0w-30 oil and with a rubber stop (with a center hole) pressurized
the oil system thru oil filter inlet. I put the filter on, filled the sump
with oil, and cranked the engine. No oil psi! I had to know what the heck
was going on with this no oil psi. Still not wanting to drop the pan I
went after the new oil pump. When I got the pump off it did not look right
to me. What I thought should be the oil psi relief valve looked strange.
Never seeing one of these before in the new Volvo engines I was not sure
how it was suppose to work. What I found was a cylinder in a cylinder with
a spring going thru it. I went to Volvo and ordered everything I could
(except the pump) that was associated with the pump. It was clear when
I got the new parts. The inside cylinder used to be a piston. The wire
snapring chipped away at the piston top everytime it would hit the stop.
Since the relief valve is made out of PLASTIC with the force of the spring
behind the piston top, it was 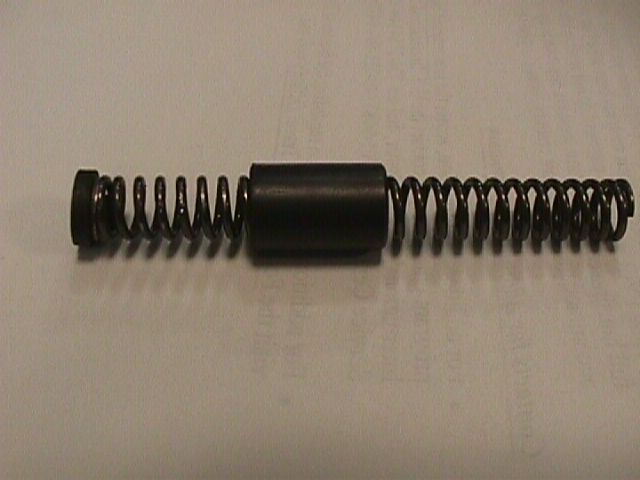 chipped
away until the spring blew the top on the piston off! No oil psi. The new
piston is made out of steel. So this will not happen again. This was a
new oil pump that had this plastic piston in it. I am told that the 850's
use the same pumps. My sisters 850's oil pump took the big vacation about
2 years ago and I wonder if this was the cause. The casting date stamp
on the oil pump in the 960 with the plastic piston was 98. So formational
purposes, the next time you do a timing belt, you may want to check to
make sure you do not have a plastic piston relief valve.
chipped
away until the spring blew the top on the piston off! No oil psi. The new
piston is made out of steel. So this will not happen again. This was a
new oil pump that had this plastic piston in it. I am told that the 850's
use the same pumps. My sisters 850's oil pump took the big vacation about
2 years ago and I wonder if this was the cause. The casting date stamp
on the oil pump in the 960 with the plastic piston was 98. So formational
purposes, the next time you do a timing belt, you may want to check to
make sure you do not have a plastic piston relief valve.
Techniques: [From JT] The
good news is that you do not have to take the oil pan off to check/replace
the relief valve piston. I never took my pan off. I am really happy that
I did nót have to take that step. I do not know how many oil pumps
came with plastic pistons or when there was a change to metal ones, but
I say rather safe than sorry. If you are coming up on a timing belt change,
pull the crank pulley and the crank timing belt gear. You will see four
Torx head bolts that hold the oil pump in. Remove the bolts and the pump
slides straight out. The piston was about $12 and the oil pump kit was
about $23 (including front seal, oil pump seal, oil pump gasket). If you
have a plastic piston in the relief valve you will have to separate the
oil pump by removing the back gasket and removing 2 small hex head screws.
Push the piston out and put the new one in. That's all. When you get ready
to install the oil pump back into the engine you will need a special tool
to get the front seal over the crankshaft. I used a thin walled piece of
pipe but I think the book called for Volvo tool #5455. It makes the job
real easy to get the oil pump back on.
960 Engine Won't Start: Sticking Valves.
[Query:] We have had two instances of sticking valves preventing
the engine in our 960 to start in the past two years. This has caused the
engine to flood, fouled plugs, and with several attempts to start, gas
in the oil. It is getting expensive at $500 a pop to "fix". Our dealership
recommended several things:
Changing to synthetic oil
Rinsing the engine with a
Blistein cleansing/filtering system
They also stated that these cars were
meant to be driven hard (o.k.), as on the autobahn (Montana here we come!).
So I guess my wife will have to become a bit more agressive on the trips
to the grocery store... What gives? [Editor's Note: see 960
Valve and Head Problems above.]
Abe
Crombie Tuneup Solution:
The 4 valve/cylinder
engines use small valves and the accompanying lighter valve springs. The
exhaust valves will on any engine get some accumulation of deposits, primarily
from fuel combustion with some portion from oil that seeps through guides
for valve stem lubrication, that in some situations can cause the valve
to slightly bind in guide. On a cold engine the guide-valve clearances
are reduced due to temperature and the fact the metals of guide and cyl
head shrink more than the metal of valve stem. You attempt to start engine
and the oil system can and does build oil pressure on these engines in
one crank revolution. This leads to the hydraulic valve lash adjusters
("lifters") filling and extending ("pumping up") while the sticky valve
is closing sluggishly and not following the cam profile.
A strong contributing
factor is excessive fuel system cleaning additives. I know this flies in
the face of what has been said loudly and often for the last few years
but it is the truth according to a recent study on this very no-start,
low compression problem. The additives used for fuel system cleaning make
the deposits on exh valve stems worse. If you don't have a fuel system
problem with symptoms then don't add anything to tank in the form of a
cleaning additive.
Premium fuel has lower
volatility and is harder to ignite in cold weather. This can make engine
not fire as strongly on initial cranking and less than stellar starting
performance give the "lifter" pump-up problem time to occur. If the engine
fires off and reaches speeds over 600 RPM the lifter filling time is lessened
enough to diminish the odds of the pump-up. Cold weather also reduces
the need for higher octane anyway as spark knock is less likely in colder
air temps.
Regular operation of
the engine at eng speeds over 4500 RPM for 5 minutes or more will cause
valve rotation that will clean stems of valves somewhat. This can be done
by driving with cruise set in "L" position on gear selector at 55 MPH.
THIS WILL NEVER HURT THE ENGINE! QUITE THE CONTRARY, IF YOU DO THIS, I
GUARANTEE YOU WILL NOTICE A SMOOTHER IDLE WHEN YOU STOP AFTER THIS EXERCISE
OF ENGINE!!! I was amazed at the difference when I tried this on my parents'
95 960.
If the no compression,
no start condition occurs you can usually get it to start if you will keep
your foot on throttle 1/4 open and operate starter for 30 seconds at a
time with a 1 minute rest. Keep throttle open until it starts. If 6 attempts
(3 minutes starter time) have been made and it is not running then you
will have to have a tow to a service shop. If cranking speed becomes slow
during this time indicating you have a severely weakened battery, stop
and charge battery or give in and have it towed to service shop.
[TSB Reminder from Jim] Volvo TSB
#TP 31714/2 "Deposits on Exhaust Valve Stems"
"M/Y 1992 960's [dated 8/93] which are
subject to driving conditions consisting of short, low speed trips may
experience reduced performance or vibration as the engine warms up. Another
possible symptom may be a sensation that the transmission lock-up is engaging
and disengaging. In most cases, this is caused by sticking exhaust
valves due to deposits on the exhaust valve stems. This condition,
in most cases, can be solved by replacing the engine oil with synthetic
oil (see Service Manager Bulletin 22-3) and driving the car at a high RPM
(5000-6000 RPM) for 12 minutes in low gear. This test drive will
remove the deposits from the exhaust valve stems. The synthetic oil will
help prevent new deposits from being formed on the exhaust valve stems."
[Editor's Note: probably applies to every B6304 ever made, not just model
year 1992.]
If Your Car Has Had This Problem: Check
Exhaust Manifold Pipes. [Tip from victim Tom Irwin] As a result
of a sticking exhaust valve, the exhaust pipe broke, internally, just inches
below the cylinder head. The resulting backwash of resonating exhaust caused
symptoms of lost performance/compression. Symptoms of break: radial cracks
around the pipe.
960 Engine Stalls and Wont Restart:
Wiring Harness. [Query from Tom Irwin:] I stranded in 100 degree
heat. Got the car 4 blocks to home (thanks Triple A). Ran the codes and
came up with DTC's 113 and 115. This points to Injector groups 1 and 2.
Twice before, only 113 came up. I've done everything I reasonably
can. Checking all connections and ohm specs. I greased the 55pin connector
at the ECM. [Response: Abe Crombie] Check the wiring harness on engine
where it comes up through intake. It may have rubbed through and grounded
to engine. [Findings from Tom:] I checked it out, right there between
the # 4 and 5 intake runners. About a .750"d loom. Had just enough clearance
to sneak in a bentnose plier and move it around. The loom cracked away
like egg shells. I could not see the rub point on the wires, but right
at the head casting extrusion was a bright, shiny, rub spot. I pulled the
loom/harness away from the head. And BOOM! Christine sprang
to life. This makes total sense. It has always died upon acceleration.
The torsional moment of the engine would tend to bite into anything against
it. I lost only group one the first time because only one wire was
worn through. With time, two wires, thus both groups lost.
Painted Bumper Cover Repair.
See Painted Bumper
Cover Repair for more information.
960 Driveline Noise: Failing Grease
Seal at Rear of Driveshaft. [The Tom Irwin Chronicles, Ch 47:
Tom finds a "tink-tink" sound coming from somewhere under the 1995 960.
After repairing a cracked exhaust manifold, he starts examining the drive
shaft and multi-link suspension.]
Continued: THEN, at THE VERY END
OF THE DRIVESHAFT, just before it mates to the Rear end... I push up and
down on it..... "TINK-A TINK-A TINK-A TINK"... and it moves a bit... That's
"TINK-A TINK" under ONE 'HAND POWER'... start applying HORSEPOWER to it
and the sound might EASILY sound like what I'm getting.... YES, this
is it... Now... WHAT's Going on??? This driveshaft end looks
different from the book, it tapers down from a tube to a solid rod, then
it terminates at a LOBRO-looking joint with 6 or 8 HEX Screws and a few
shims... it's only when in motion, or rather under acceleration.. REALLY
LOUD "TINK-A TINK-A" noise. Like an exhaust pipe... But I just replaced
EVERYTHING North of the Resonator... This end of the driveshaft SEEMS
to be a tube welded around a shaft rod, like a modified Constant Velocity
Joint, with a rubber boot and the works..?? What's inside the cadmium-plated
cap? A Bearing/Bushing? Did something possibly break in there? Do you just
need to re-pack the grease sometimes? There is a LARGE AMOUNT of
dried, caked grease all over all around this thing and the gas tank tunnel
where that bugger sticks out... Looks like it has been SLOWLY losing a
bit of grease every so often over 5 year and 125k miles. The boot looks
ok... probably out of the end cap... I'll use the RTV.. Interestingly
the spray pattern of the grease is fairly widespread, fore and aft span
totals about 18 inches. I'll bet tomorrow I'll find it dry as a bone...
hope there is no galling or pitting of the balls. THIS appears to
be the cause of the "TINK-A TINK-A TINK-A" sound, previously blamed fully
on the broken cat pipe..... That little burp up to 6,200 RPM dropped me
crisply into 1st gear and must have WAILED the shit out of that shaft,
displacing enough grease to allow the bearing to slap. The noise
of course would be amplified by yet ANOTHER STEEL sleeve tube over an inner
pipe/shaft...
[Comments from Abe Crombie] The end of
the shaft is welded to a splined shaft to accept the joint. It is a CV
joint with the inner 6 slot hub driving the outer 6 slot housing via 6
10mm +/- ball bearings. The grease can dry out and the joint will wear
a bit and the driveshaft will actually begin to move axially and make noises.
If you are lucky the grease will fix it indefinitely. Does the grease deposit
line up with the CV joint-pinion flange joint or does it look like it escaped
through the boot? The boot on those should last almost forever unless
road crap maybe damages it. If it looks like it seeped through the
cap then seal it with silicone sealer on outer perimeter to prevent this
loss of lube again.
You can remove rear section of shaft from
pinion flange via the 6 Allen bolts. Tap the end cap off the joint. Once
the shaft is removed at rear you will see the back end of this joint is
closed by a cadmium-plated cap. You should be able to tap around the edge
of the cap and get it off. Wipe out the grease and then pack it full of
wheel bearing grease and then place cap on and reinstall shaft on pinion
flange. Oh, BTW if it's not too late you should mark the joint to
the flange to preserve balance if it was dynamic balanced. It will be paint-marked
if the paint has lived this long.
These assemblies have no history of failure
so piece service parts aren't available. The whole shaft would need to
be replaced. The CV-jointed rwd driveshafts like this are rarely serviced
on any of the Euro (Volvo,Benz, or BMW) models.
[Comment on Grease from Jim Bowers] I
believe the grease for CV joints is something more than axle grease. Years
ago, I used to get some special stuff from the dealer for the CV joints
on the axles of my Porsche. It looked like it was loaded with Molybdenum
Disulfide. Anyway, I think the parts store should have something recommended
specifically for CV joints.
Volvo
Maintenance FAQ for 7xx/9xx/90 Cars
Top of Page